 MailDirect Help
Campaign Wizard – Finalize
Campaign Wizard – Finalize
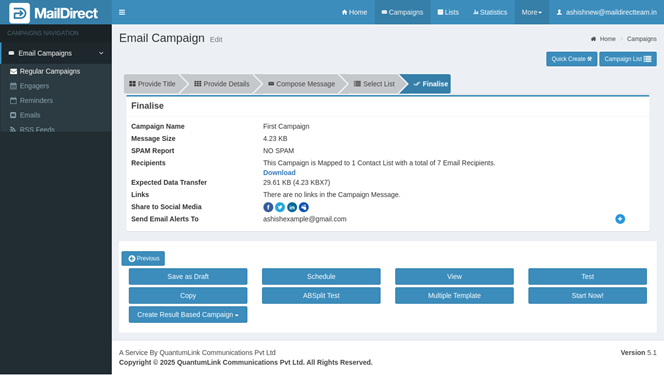
Figure : Creating New Campaign –Finalize Page
The section provides the details of Campaign Name, Message Size and No of Recipients, Lists Mapped along with option to download Recipients with or Without Custom Fields, Expected Data Transfer, Link Details, Share to Social Media, Google Analytic Link and Send Email Alerts To Details. It also contains the actions buttons for the necessary action. Refer Enable and Disable Google Analytics to view links exists in the campaign message and add/remove Google Analytics option.
In case the user want alert to be send after the email is send click  after Send Email Alerts.
The popup will appear as:
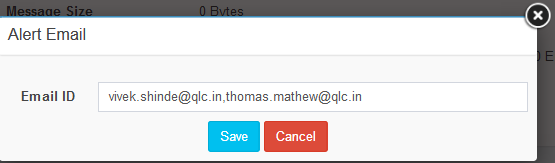
Figure : Creating New Campaign –Finalize Page - Alert Email
Enter Email Ids comma-separated and click Save Button to Save and Cancel to Discard.
On Save the Send Email Alerts To section will display as:

Campaign Options
The following options are provided at the bottom of the Page:

Figure : Creating New Campaign – Finalize Page - Options
Users can click any one of the following button:
- Save a campaign as a draft using the Save as draft button.
- Schedule it for launch on a later date using the Schedule button.
- View Campaign Details using the View button.
- Run a Test Campaign by clicking Test Button.
- Copying Campaign using Copy button.
- Create or Edit AB-Split Test Campaign it using AB-Split button.
- Create or Edit Multiple Template Campaign it using Multiple Template button.
- Create Result based campaign based on viewed and not viewed recipients.
Note: Users who do not configure DNS records, including DMARC, SPF, and DKIM, will see an error message pop-up when clicking the Start Now, Schedule, Test, and Create Result base button. They will be unable to proceed until DNS records are configured. At this point, the user is not allowed to Start, Schedule, or test the Campaign.

Figure : Create Email Campaign - Error : Missing DNS Records