 MailDirect Help
Email Wizard – Compose Message
Email Wizard – Compose Message
To compose Email message:
- Mail Direct displays the Compose Message screen.
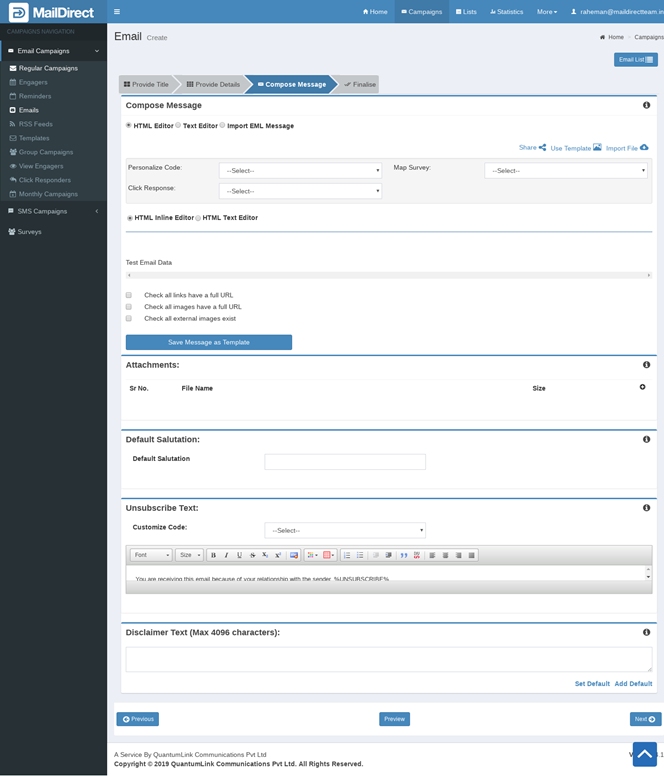
Figure : Create Email – Compose Message
Users can compose a Email message by selecting:
- HTML Editor Option
- HTML Inline Editor option OR
- HTML Text Editor option
- TEXT Editor Option OR
- Import EML message option
HTML Editor.
Select the HTML Editor option (By Default Select) to compose a message in HTML format.
There are two options in HTML Editor Option
Compose Message by HTML Inline Editor Option
Selecting HTML Inline Editor Option will display as:
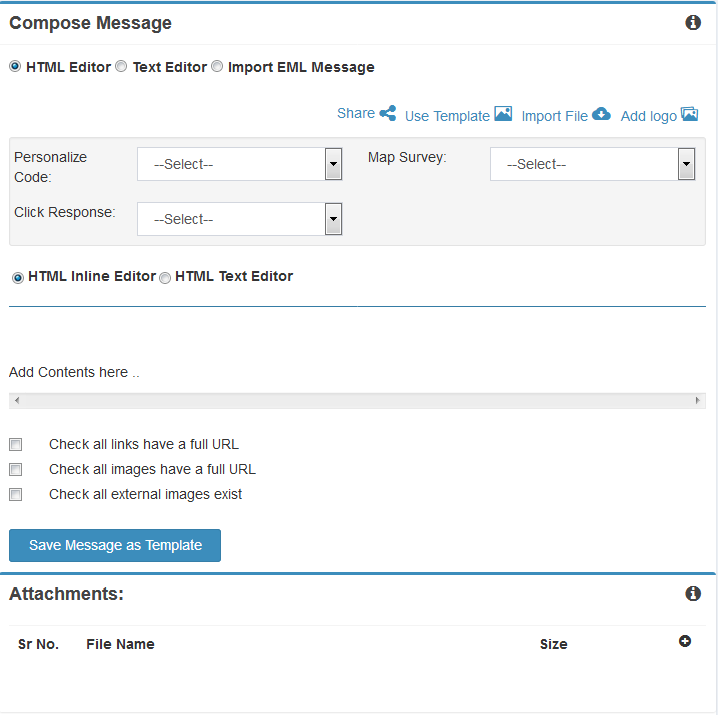
Figure : Creating Email - Html Inline Editor
Compose Message by HTML Text Editor Option
Selecting HTML Text Editor Option will display as:
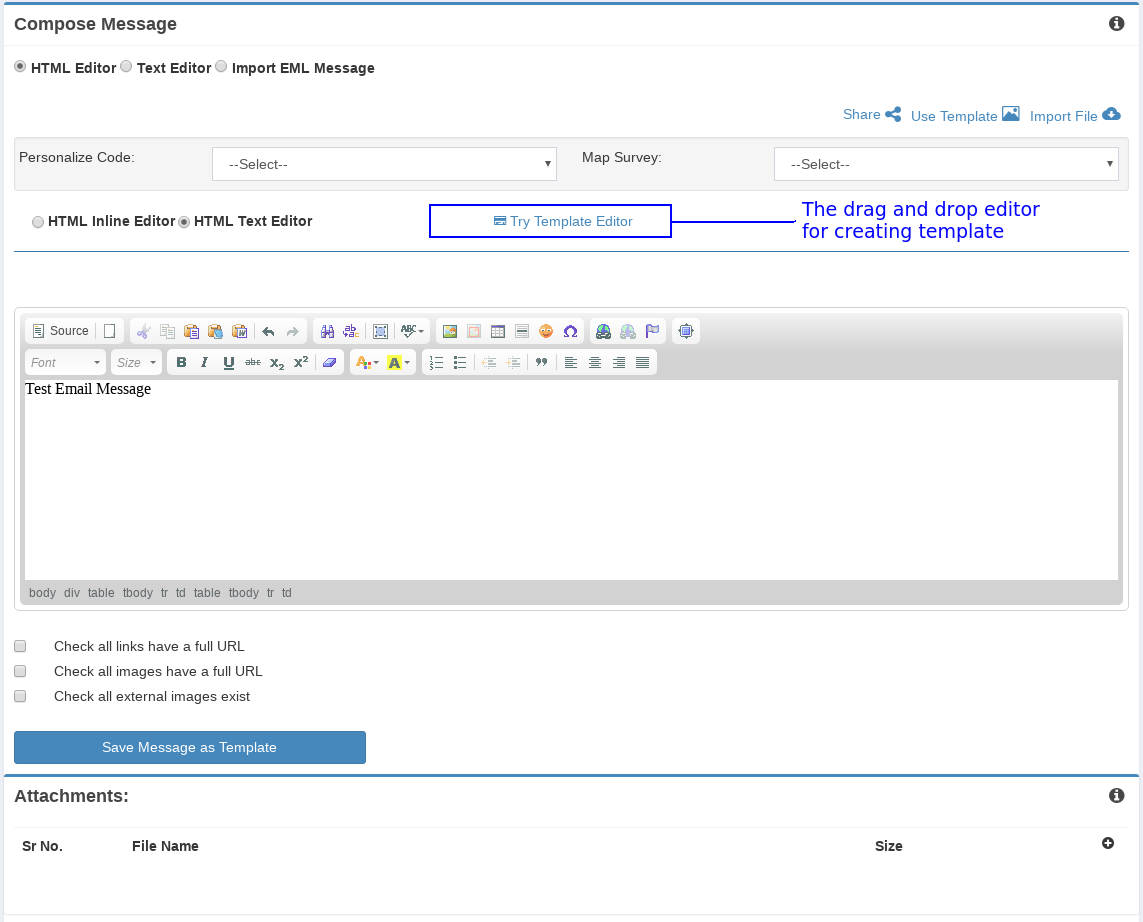
Figure : Creating Email - Html Text Editor
Table : Compose Email Message Using the Html Editor
|
Field |
Description |
|
Map Survey |
Select an appropriate survey to be mapped to the campaign Note: On selecting the survey, a link f or the survey is added in the text area |
|
Map Click Response |
Select an appropriate click response to be mapped to the campaign Note: On selecting the click response, a link for the click response is added in the text area |
|
Select Personalize Code |
Select an appropriate personalized code to be sent in the campaign message. The personalize code contains custom field and custom link generators for Unsubscibe, Report Spam, Open Link in New Window, Edit Recipients and Forward to Friend. RSS Feed defines the area where RSS Feed Needs to be displayed |
|
Share |
Select to share link in social media |
|
Use Template |
Select default template provided |
|
Import File |
Import URL contents from Import File |
|
Add Logo |
Select Logo for Campaign created |
|
Text Area |
Type an appropriate campaign message |
|
Standard Format Options |
Select the appropriate format options to apply to the text entered in the Text Area |
|
Try Template Editor |
Click this to create/edit template or compose messages |
Share
This option provides share link in social media.
1. On Clicking Share link the pop up will be displayed. As shown in figure.
2. Select appropriate fields to share link.
3. Select field is mandatory.
4. Clicking Share button provides the link which allows the Email Content to Share with the Social Media.
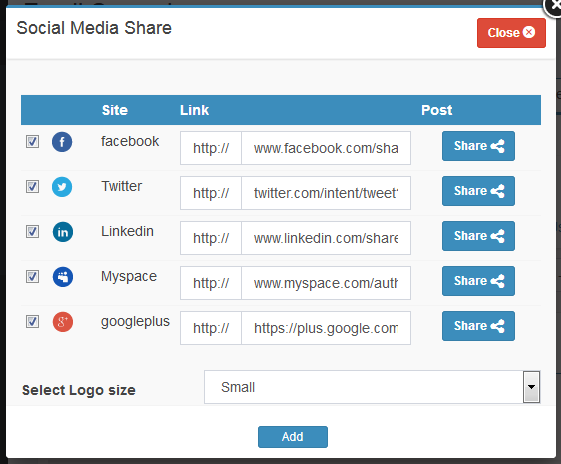
Figure : Email Wizard - Add Social Media
Use Template
Adds Predefined templates to Compose Message, including Custom Template.
1. On Clicking use template link the template pop up will be displayed.
2. Selection can be made based on Category.
3. Search can be done on the based on template name.
4. Template preview is available can view click on preview link.
5. The templates selected are inserted in the Compose Message.
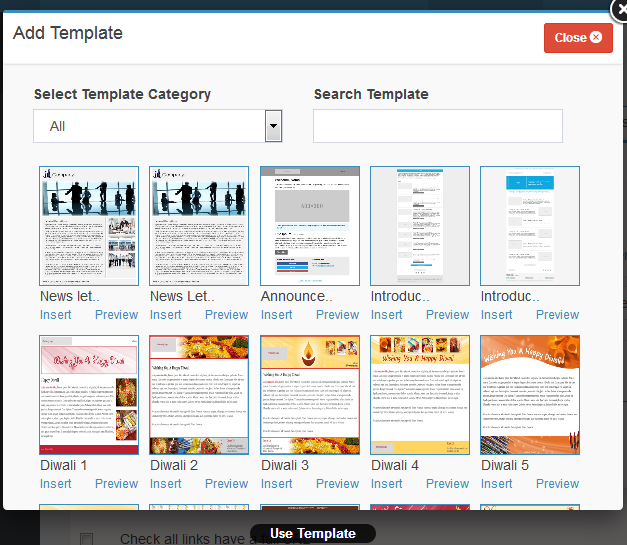
Figure : Email Wizard - Add Template as Content

Figure : Email Wizard – Template preview
Import File
Import contents from an existing page of a site.
1. On Clicking import file link the import file pop up will be displayed.
2. Enter a valid url in text box and Click Import File to import the contents from url.
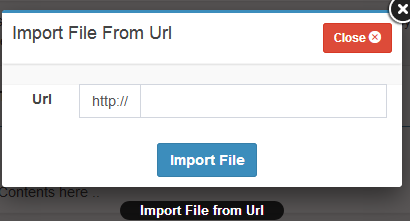
Figure : Email Wizard - Import Contents from Other Site
Add Logo
Add Logo inserts Logo (Created in Client Repository) in the Compose Message.
1. On Clicking add logo link the add logo pop up will be displayed.
2. Select an appropriate logo to be inserted.
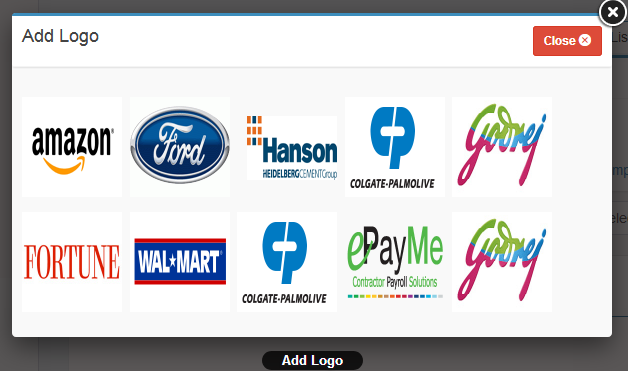
Figure : Email Wizard - Add Logo in Contents
Check link
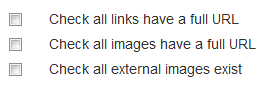
Figure : Check link option
- This option provides to validate check all links having full URL i.e. valid URL.
- Check all images having full url.
- Check all external images exists i.e. Image is available with valid url.
- This option is used only for HTML messages
- If images or links are found invalid, it will be displayed in the error message.
- On clicking the image link, the dialog box will be displayed to insert new image link.
- On clicking the link, the dialog box will be displayed to insert new link.
Save Message as Template

The details are explained in Save Message as Template Section
Attachment
Adding Attachment
Clicking Plus  Button opens windows browse directory to select the attachment as shown below.
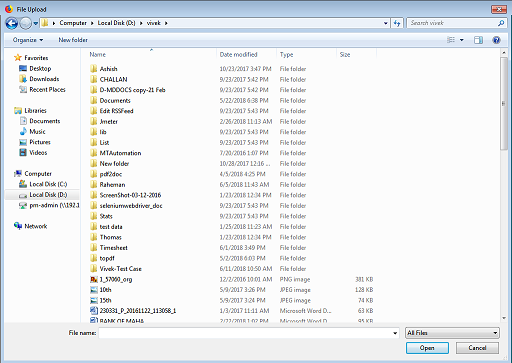
Figure : Create Email - Upload Attachment
On selecting file the attachment section will be shown as:
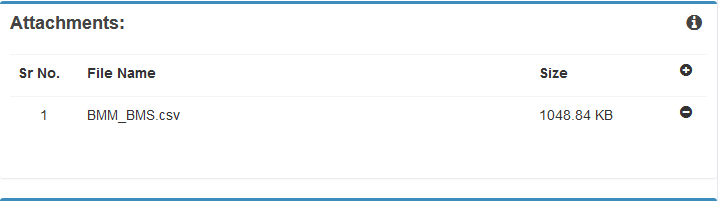
Figure : Create Email - Attachment Section
Removing Attachment
On clicking  the attachment will be removed.
Compose Message by Text Editor
- Mail Direct displays the Compose Message screen with the Text Editor option on selecting Text Editor.
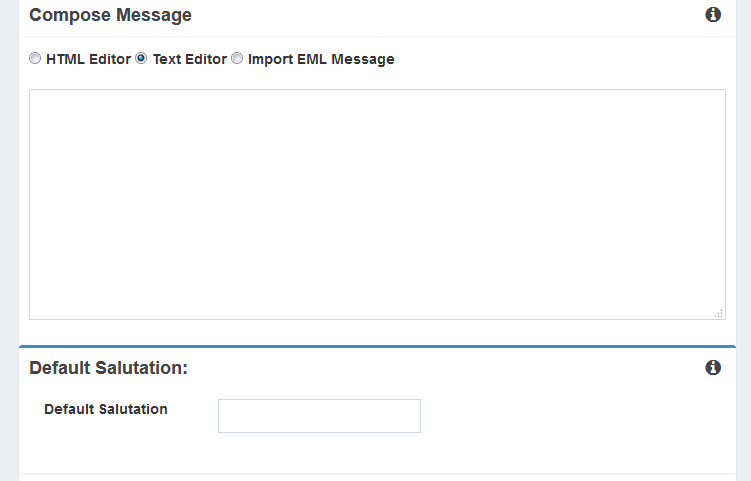
Figure : Creating Email - Text Editor
Compose Message by Uploading EML message
- Select the Import EML message option to import an EML message.
- MailDirect displays the Compose Message screen with the Import EML message option.
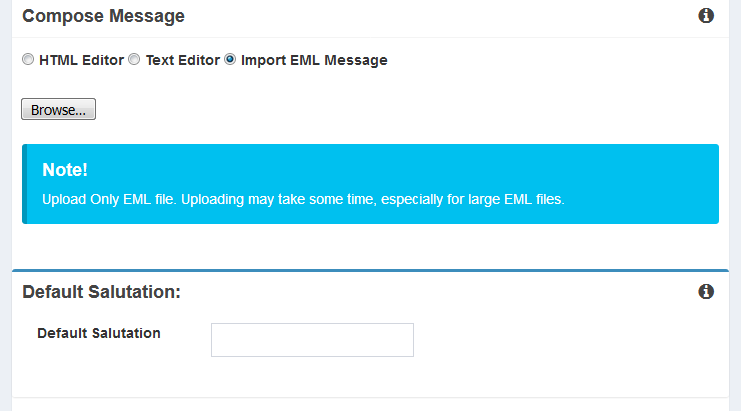
Figure : Creating Email –Import EML Message
Table : Creating Email –Import EML Message
|
Field |
Description |
|
Browse |
Enter the location of the file or click Browse to go to the location of the EML file and attach an appropriate EML. |
Note: Before importing the EML file, map an appropriate survey in the HTML Editor and copy the survey link at an appropriate position in the EML file to be imported.
- Enter the location of the file or browse to the appropriate location.
Compose Message Options
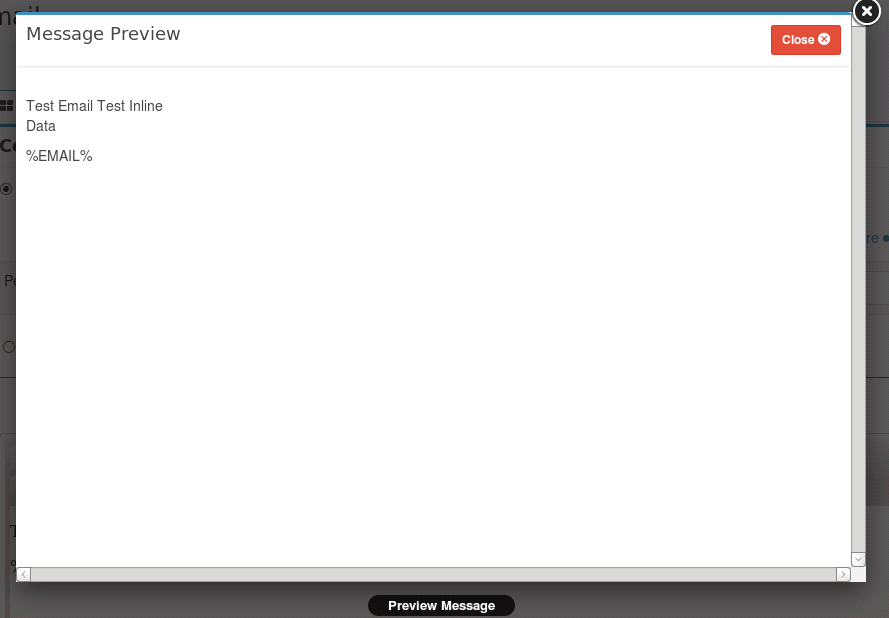
- Click the Preview button.
- Mail Direct displays the Preview screen.
- The user can preview the composed message.
Default Salutation

Figure : Create Email - Default Salutation
If custom variable %FNAME_LNAME% set then it will replace it with FirstName LastName if FirstName and LastName exists. If only FirstName exists it will replace with FirstName and similarly if only LastName exist it will replace with LastName. In case if FirstName and LastName does not exist then it will replace with the input text at Default Salutation.
Unsubscribe Text
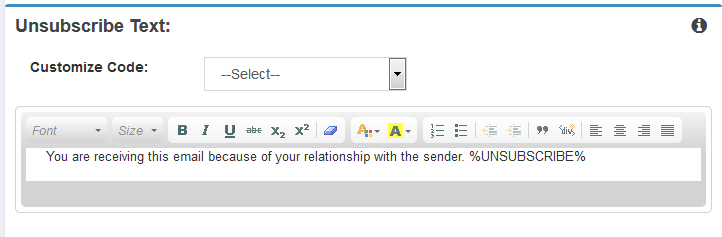
Figure : Create Email - Unsubscribe Text
Unsubscribe Text provides option to modify the unsubscribe message and link, in order to enable recipients to unsubscribe from Mailing List.
Disclaimer Text

Figure : Create Email - Disclaimer Text
Disclaimer Text provides option to modify or add disclaimer text. User can also set default disclaimer text for all emails by clicking Set Default Link.
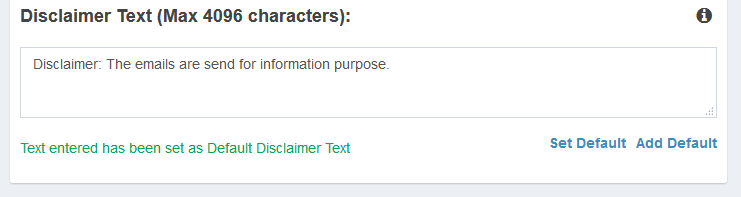
Figure : Create Email - Disclaimer Text - Set Default
Users can also Add default disclaimer text for all emails by clicking Add Default Link.
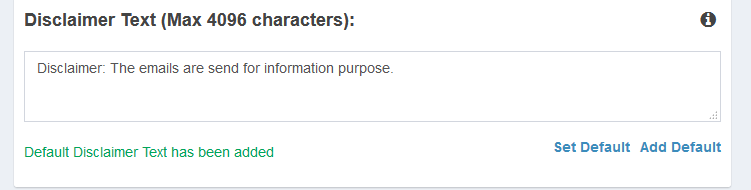
Figure : Create Email - Disclaimer Text - Set Default
- Click the
 Next button.
Mail Direct displays the finalize screen.